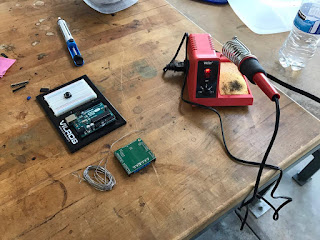
Figure 1: Soldering setup
I had a nice little setup in the lab, as can be seen in Figure 1. A slightly wet sponge, a heating up soldering iron, and shaky hands.
Figure 2: not the prettiest job
I'll be the first to admit that my solder job doesn't look the best. I tried this alignment technique using the Arduino pins themselves, but I think the pins are misaligned by a little bit, so my solder job went a bit misaligned. That is just for two rows of pins though, as seen in Figure 2. Two other rows came out totally fine. Even the jumper pins and motor/power junctions came out decently well.
Figure 3: Oh babyyyy
Figure 3 shows the underside of this motor shield. It's the result of my first time soldering. Happy days! Next up I'll have to find out if it actually works as it's supposed to work. I really hope it does. Maybe I'll hook up a low power DC motor I have first to make sure it actually works, and then I'll hook up the big-boy actuators.
I hope I didn't burn anything..
Here are a few more pics of the shield attached to the Arduino.


No comments:
Post a Comment